Strawberry Santa

Here is a perfect recipe for the Christmas season! It can help keep the kids entertained, and it’s a good bite sized pudding (and it’s not that unhealthy either – bonus!)

Ingredients

  • A tub of strawberries
  • 4 ounces of cream cheese (I used low fat Philadelphia in an attempt to make it healthy!)
  • 2 tablespoons of Honey (I used honey as a natural sweetner)
  • Vanilla extract (you can use a teaspoon to flavour, or do what I do which is pour in a blobs worth until you’re happy – its up to you!)
  • Chocolate chips
  • Piping bag (this isn’t an ingredient, but you’ll need a large nozzle and a smaller nozzle)image1(1).JPG

How to make

  1. Cut off the leaves from the strawberry to give your santa a nice, flat base.image2(1)
  2. Cut the top of the stawberry off. Make sure you don’t get the tops mixed up with the other strawberrys, as these tops are the santas hats.image5
  3. Next stage is to make the cheesecake mixture – yummy! Put the cream cheese into a bowl and add the honey to it. Mix it really well together, you want a smooth texture. Its easier if the cheese is at room temperature as it makes it softer and easy to mix!

    4. After everything has been mixed together, you’ll want to put it into a piping bag with a large nozzle. Pipe the mixture onto the base of your santa, and then add the hat on top. You’ll want to use a fair bit of the mixtur as you’ll need to add chocolate chips. Use the chocolate chip as eyes and place them in your santa.image6
    5. Change the piping nozzle to a smaller one, and add a dot of mixture to the santa hat, and add dots to the body to simulate buttons. image7

And there you have it, really adorable looking Santas! I hope you have trying these out. Let me know how they go 🙂
Until next time,
S
x

Follow my blog with Bloglovin

My tips and tricks for studying

Now I know I’m not the only one out there who must hate studying with a passion. The only part I enjoy is all the stationary buying prior to actual studying. However, due to the career that I want to go into, not studying or not revising isn’t an option for me, as I have to take 14 exams, each with a pass mark of 75%. So I have come up with my list of best tips and tricks for studying. I hope you enjoy!

Preparation

I don’t know if anyone is like me, but I have to have a plan of what I’m going to study that day, otherwise I won’t get anything done! I use my Erin Condren planner to help me keep on track of my studying, as well as helping organise my general day to day activities. I will usually come up with a plan for the week on a Sunday evening, and I will make sure that the tasks I set for myself are easily achievable, otherwise I’ll get discouraged when I don’t get it completed. You could also use a wall calender to really plan out when your exams are, and you’ll be able to clearly see how many days you have left till that exam. Below is an idea of how you could plan:
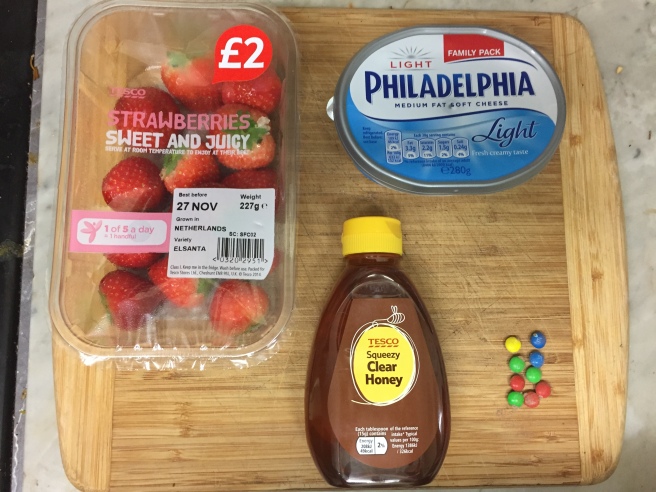
image1Food and Drink

This one might sound weird, but the number of times I have stopped studying because I’ve become hungry or thirsty is uncountable! I like to make sure that I get myself a large drink before sitting down to study, and I’ll usually get myself a bottle of something as well, just in case I run out and try to use it as an excuse. I’ll also get myself a snack of some sort for me to nibble on. It’s usually fruit or vegetables of some sort – a bowl of cherries, chopped up carrots and cucumber… well, you get the idea! This way I can absently mindedly munch to my hearts content without feeling guilty or unhealthy.

Note taking

Now that you’re ready to get started, its time for us to get down to the nitty gritty of studying – actual note taking. This can be super daunting for anyone; you’ve got a blank page in front of you, hundreds of pens, textbooks piled next to you… Where an earth do you start?!

The first thing I will usually do, is read through the relevent pages in my textbook and highlight key points that I will later use to make my notes.

DSC_0852

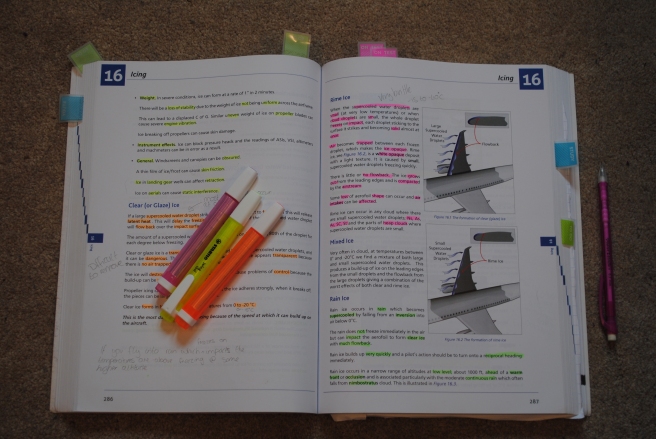
Once I have all the relevant bits highlighted, I will start to make bullet pointed notes. Initially, I will write these in a plain format, before colouring the key parts, and I will usually add in pictures if I need to. I like to make my notes as colourful as possible as I find this is the best way to stop myself getting bored when I read back over them at a later date.

image2

Posters

This is probably my most favourite part of studying, transforming all my notes into colourful posters! I find it’s a really useful aid to have lots of posters stuck all over my walls, so when I’m bored I can just choose one to look over. You can do anything you want to make your posters as interesting or as plain as you want – it’s up to you!

TAKE A BREAK

My final tip is don’t be afraid to take a break! I like to take breaks every 45 minutes, but if you’re struggling to get in the mindset of studying, then don’t be scared to take a break every 20 minutes instead. Breaks allow the mind to absorb the information you’ve just studied, so use them to your advantage. Another good idea is once you’ve finished your studying for the day, go for a long walk, or even go to the gym. It’s a nice bit of downtime for yourself, and can get rid of any excess energy you might have from sitting still in one place for so long.

I hope my tips help with your studying. Do you have any tips and tricks that you use to help you study? Leave a comment below and I will be sure to check them out!
Until next time,
S
x

Lush Review – Vanishing Cream Moisturiser

So, from the title of this blog, I think we can all guess I have decided to write a little review about one of my favorite products from Lush – Vanishing Cream.

lush

I was first introduced to this moisturiser a couple of years ago, and it has honestly been my holy grail of goodness! My skin type is fairly oily with the odd patches of dry flaky skin (as you do) and I have always struggled to actually find a mosturiser that doesn’t overwhelm my face with oils, but is good enough to add moisture to the dry patches on my face. And this product just fits that bill!

When I first bought this product to try, I was apprehensive as the cream itself is very watery, and I even had an awkward moment when I spilt  half of it down my sink! However, I decided to give it a go (even though I had lost half of it) as it is on the higher scale on the price range. The first thing you notice about this face cream is the smell! If you’re not a great fan of Lavender, then this might not be for you, but as I love this smell I was eager to try it. I found that once applied to my face I didn’t need as much as I had anticipated, but I didn’t mind as it soaked in pretty much straight away! It didn’t leave my face feeling greasy, and it was a very ‘light’ product to apply to my skin. All on all, I was very happy!

Long term with this product, I found it helped my oiliness in my skin really well, and also helped to stop me getting dry patches on my face. The reason for this? The Lavender that’s in the product is very good for helping your face control the amount of oil that is produced. If your face is over producing, then the Lavender will help to control this, and vice versa – it is prefect for problematic skin! Also, if you have acne problems, again, no problem! There is Witch Hazel in this moisturiser which helps to reduce inflammation, thus hopefully reducing the appearance of acne.

In conclusion – if you are willing to try a new moisturiser and splash a little bit more money than you might usually do, then please try this! The perfect face cream for all types of cream. You won’t be disappointed!!
Until next time,
S
x